Getting Started Arduino
Apr 04, 2016 By Muhammad Abrar
Introduction
The Arduino is a single board microcontroller that can be programmed to process inputs and outputs from different components externally connected to its GPIO's (general purpose input output).In laymen's term Arduino is a small computer that can be used to calculate and process data from different sensors connected to its inputs and then on the basis of that data calls out an event on the outputs The Arduino can be connected to LEDs, dot matrix displays ,buttons, switches, motors, temperature sensors, pressure sensors, distance sensors, GPS receivers, Ethernet modules, or just about anything that outputs data. Arduino can also be extended by connecting different shields .shields are pre built circuits containing other devices such as Ethernet module, GPS receiver , Wi-Fi module, GSM module , LCD to get extra functionalities.
Arduino is programmed using Arduino IDE (Interactive Development Environment) that runs on your computer and is used to write the code and upload it to the Arduino board using a USB. In Arduino environment the programs are known as sketches. The Arduino IDE uses simplified version of C++, Providing user the flexibility and ease in programming your code.
Technical Information:
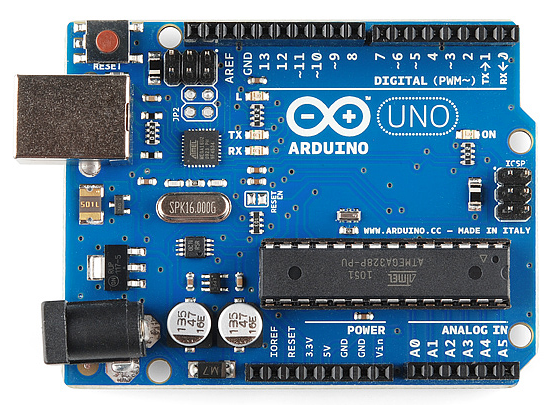
Arduino family contains many boards like Arduino Uno(R3) ,Mega, Leonardo ,lilypad ,Red board. These boards are different in terms of number of GPIO's,expansion modules, memory and chip type. for example if we need greater number of GPIO's then we will prefer arduino Mega over Arduino Uno.if we intend to make a wearable product so we will go for arduino lilypad which can be sewn into clothes and contains its own sensors that are even washable but the most used, most documented and great choice for beginners is Arduino Uno R3. The Uno is a microcontroller board based on the ATmega328P. It has 14 digital input/output pins (of which 6 can be used as PWM outputs), 6 analog inputs, a 16 MHz quartz crystal, a USB connection, a power jack, an ICSP header and a reset button. It contains everything needed to support the microcontroller. simply connect it to a computer with a USB cable or power it with a AC-to-DC adapter or battery to get started. See Table 1.1 for more technical specifications of Arduino Uno.
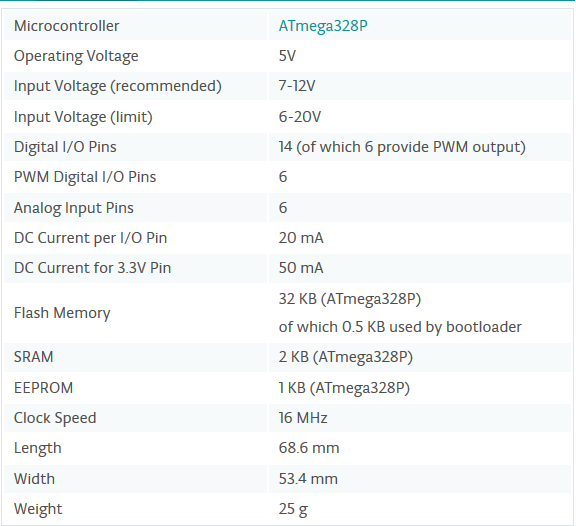
Table 1.1 : Arduino Uno Specifications
One of the flexibility that Arduino Uno have is that the the chip (At-Mega 328p) is not soldered into the Uno's board rather it is connected to the 28 pin IC Base. So if you need just the chip in your project permanently just pop it out of the base and replace your Arduino Uno board with new AVR chip. AVR should be programmed with Arduino Bootloader before using it with the board. Let's not get into details of how to pre-program this chip with arduino bootloader as these are readily available in the market.
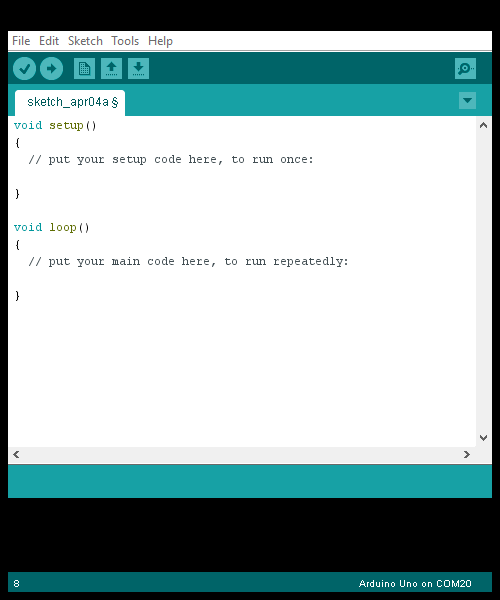
Welcome to the Arduino Environment (IDE):
As I have mentioned above that Arduino is programmed using Arduino IDE that runs on your computer. Have a look at the IDE you can do all the stuff like copying your code from IDE, paste code from any source into IDE easily just like normal windows routine.Arduino coding langaue is simplified form of C/C++.Working with different motors and sensors is made easy by built in libraries that contains pre defined functions to control them.
After connecting your Arduino board to Computer via USB for the very first time, choose the right port by going to port option located in the Tools menu. Other than that IDE is very interactive, simple and easy to use.
Lets Code :
In Arduino Environment, program is known as Sketch. Sketch is composed of two bodies, Setup and Loop. Instructions or code in the setup body will execute only once after uploading it to Arduino board. While anything in the loop will execute repeatedly meaning that the code in the loop will run forever until Arduino is turned off. A Tip for you guys, In the body of Setup, you should always declare the pins you want to choose as inputs and outputs. While the loop should contain the main functionality of your arduino project. For the sack of understanding let's see a coding example.
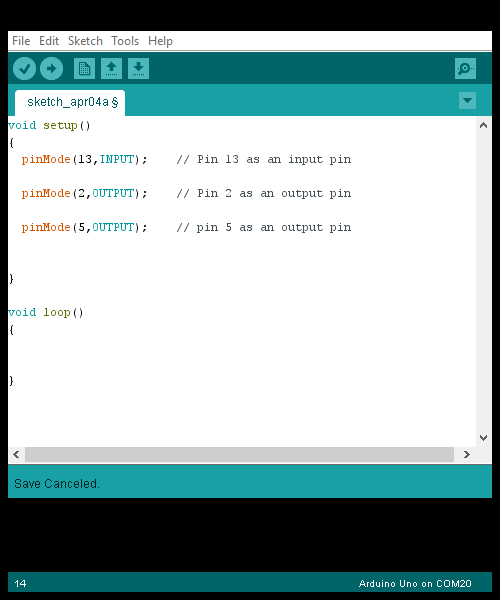
In the above example I declared all the inputs and outputs in the Setup body using pinMode(Pin number ,Input/Output). Suppose that pin 13 of Arduino uno has led connected to it ,so we will declare it as an output and pin 5 has a 5 v source connected to it indirectly via a pushbutton , so we will declare it as an input. Now we will program our Arduino to turn the led on when push button is pressed.
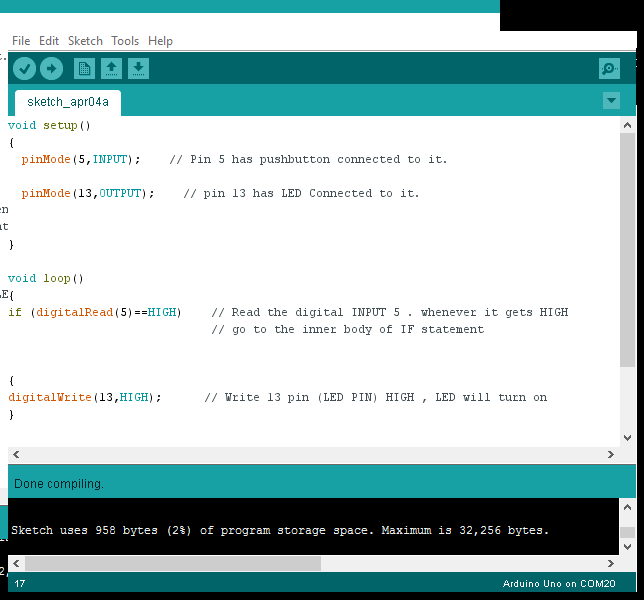
There we go !! compile this code using verify button located below the file menu and upload it to the arduino board using upload button located next to the verify. Note that Arduino Uno has an led that is already connected to pin 13, so no seperate led is needed.So That was our 1st code in arduino and with that that's all from todays article, In this article i tried to convey the general idea of what arduino is and a touch of how to code arduino. I hope it helps.Stay tuned for more interesting articles on Arduino.i would love to answer your questions.
Comments
BBCode Tags
| BBCode | Rendering |
|---|---|
| [b]bolded text[/b] | bolded text |
| [i]italicized text[/i] | italicized text |
| [u]underlined text[/u] | underlined text |
|
Auto link already enabled. |
http://example.org |
|
Auto image already enabled. |
 |
| [code=php]<?php echo 'Hello!'; ?>[/php] | |
| [quote]quoted text[/quote] | quoted text |
|
[list] [*]Entry 1 [*]Entry 2 [/list] |
|